
Car batteries can die without any warning; however, in most cases, you will notice a distinct decline in your battery’s performance once it starts to age.
So if you are having trouble starting your car in the morning, or if you experience problems with the central locking and security system, or experience other intermittent electrical issues, your battery is almost certainly the cause.
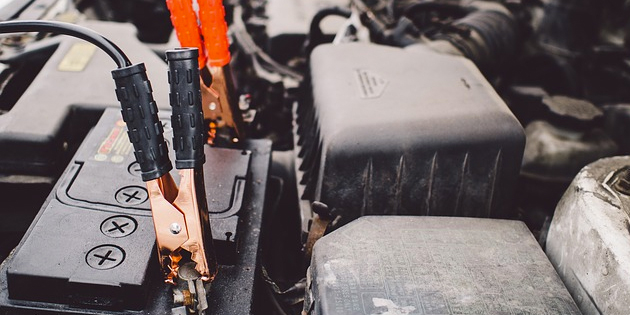
Battery replacements are less complicated than they appear, so if you want to save some money, here is how to replace your car’s battery yourself in less than 30 minutes. Note however that some details may differ from car to car, but in general terms, this guide will apply to almost any car except hybrid, or purely electrical vehicles.
Time required:
About 15 to 20 minutes.
Difficulty level:
Easy to moderately difficult, depending on the battery location.
Special precautions:
- Always wear suitable eye protection when working with car batteries.
- Always wear acid-resistant rubber gloves when working with batteries to avoid skin contact with battery acid.
- Always have a supply of clean water available to rinse off battery acid after accidental skin contact.
- Never smoke when working around charging batteries to avoid accidental ignition of explosive hydrogen gas.
- Always keep children and persons not involved with the work away from the work area to avoid accidents and injuries.
- Always ensure that the ignition is in the “OFF” position when working with batteries. Better still, remove the keys from the ignition to avoid arcing and voltage spikes when re-connecting the terminals.
You will need:
- Replacement battery with the same ratings and capacities as the existing battery. Also ensure that the poles are in the same relative positions as on the old battery, and that the physical dimensions are the same to ensure that the hold-down device will fit over the new battery.
- Memory saving device. Most auto parts stores have these devices available, but avoid the cheaper brands- they are cheap for a reason, and often cause more harm than good.
NOTE 1: Memory saving devices keep the vehicles’ critical systems powered when the battery is disconnected. Most high-end cars, and particularly Honda products can suffer damage to sensitive electronic systems, such as the audio system when the power supply is removed.
WARNING: It is not uncommon for Engine Control Units to lose their memory, or operating systems if a battery is disconnected in the absence of a memory saving device. If this happens, the car won’t start, or if it does, it may very serious driveability issues. Fixing this requires that the ECU be reprogrammed, or replaced.
- Wrenches to loosen the battery terminal clamps. These could be 10mm, 12mm, or 13mm, depending on the car.
- Battery terminal brush, or a stiff steel wire brush.
- Dust mask to prevent inhaling air-borne, acid-laden dust particles.
- Baking soda (Optional)
Step 1.
Connect, or insert the memory saving device strictly according to the instructions in the packaging.
Step 2.
If there are accumulations of acid or corrosion on the terminals, neutralise them with a solution of baking soda and luke-warm water. Wear suitable eye protection when pouring the solution over the poles, and avoid splashing. As soon as the bubbling reaction stops, use copious amounts of clean water to rinse the acid residue off the battery and surrounding area, but ensure that no water comes into contact with wiring or electrical connectors.
NOTE: if the battery is located inside the car, do NOT use water to clean of the acid and corrosion. Instead, put on a dust musk, loosen the accumulations slightly with the wire brush, and use a vacuum cleaner to suck it off the battery. Be sure to clean out the vacuum cleaner when you are done!
Step 3.
Use a suitable tool to loosen the NEGATIVE terminal (marked with a “-“ sign) first, and remove the terminal from the post with a twisting motion. By removing the negative terminal first, there is no possibility of causing an accidental short circuit against the body work when you loosen the positive terminal.
Step 4.
Remove the POSITIVE terminal (marked with a “+” sign) next, and use suitable tools to remove the hold-down device. There are many different designs, but if yours is made of steel, check it for corrosion damage, and be sure to replace it if it is a less than perfect condition. Place the hold-down aside, but be careful not to lose the small bolts or nuts that secure it to the body work.
Step 5.
At this point, there should be nothing else holding the battery down, so take a firm hold of the battery, remove it from the car, and place it in a position where it cannot cause injuries to children and pets. Inspect the rubber insulation mat for damage, and replace it if it is damaged in any way.
Step 6.
There may still be acid residue present on the battery carrier plate, so use some more water to rinse the entire area until all traces of battery acid have been removed or neutralised. Now would also be good time to clean the battery terminals with the wire terminal brush to remove all traces of corrosion. The cleaner the terminal contact areas, the better the contact with the battery post, and the happier your car’s electrical system will be.
Step 7.
Place the new battery in the car, and fit the POSITIVE (+) terminal first. This way there is no possibility of causing accidental short circuits against the body work, since with the negative cable still unconnected, the circuit cannot completed if toy accidentally touch the body work with the wrench. Be sure to tighten the terminal properly, but do NOT over tighten it- only tighten it so that no movement of the terminal on the battery post is possible.
Step 8.
Fit the NAGATIVE (-) terminal, tighten it properly, and refit the battery hold-down device. Double check that everything is tightened properly, and that all protective rubber or plastic caps are in place, and secured. Remove all tools from the engine compartment.
Step 9.
Remove, or disconnect the memory saving device according to the instructions provided, and start the engine to ensure that the new battery works. Check that all warning lights go out, and that the audio system and all other electrical systems/controls work. If something does not work after the battery replacement (which happens occasionally), do NOT try to fix it- instead, obtain professional assistance to avoid damaging anything else.
NOTE: On some Honda products, the audio system may not work despite having used a memory saving device, or it may stop working several days after the battery replacement. If this happens, you need to re-enter the system’s security code, which will be included in the documentation that came with the car. If not, the code can be obtained from the dealer when you present them with the VIN number, and perhaps some ID, and the title to the vehicle.
Step 10.
Do NOT dispose of the old battery into the environment- return it to the dealer to get the lead credit that is due you. That’s it, with that out of the way, you are done, and should enjoy several years of trouble-free motoring with your new battery.
Enjoy learning how to replace a car battery?
If you can, please share this article on social media. It helps us tremendously!


No Comments