
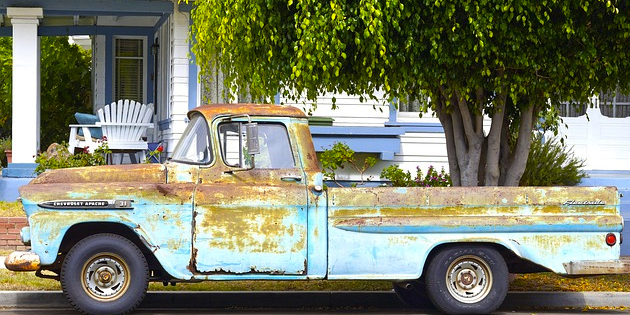
You may have been watching the rust on your truck spreading with some trepidation, but there is really no excuse for allowing your vehicle to rust away right from under you, in a manner of speaking of course.
Removing surface rust from a vehicle is not as difficult or complicated as it sounds, and with some basic tools, some free time, and the willingness to save a ton of money, anyone can remove rust from almost any vehicle. Here is how you can remove the rust from yours…
Time required:
From a few minutes to fix minor rust spots to several days, depending on the severity and location of the rust.
Difficulty level:
Easy to moderately difficult, depending on the location of the rust to be fixed. However, if you are not skilled at spray painting, leave the final painting and finishing to someone who is. Spray painting is not for everyone, and you could do more harm than good if you are not experienced at it.
Special precautions:
- Always wear a dust mask to avoid inhaling body filler dust and paint fumes.
- Never smoke while working with solvents to avoid accidentally setting your truck on fire.
- Don’t apply body filler on humid, or rainy days- not even under cover in a garage, because the moisture will prevent the body filler from adhering to the metal.
- Do not work in direct sunlight, since the body filler may cure to quickly, causing it to crack.
You will need:
- Body filler and hardener.
- Spot putty to fill in small imperfections in the body filler
- Fibreglass mat and resin. (Only if the rust has perforated the metal, and you cannot replace the panel)
- Sanding block.
- Dust mask.
- Putty knife or other suitable scraper.
- Body file to shape large areas of body filler. (Optional)
- 400 grit sand paper.
- 800 grit sand paper. (Used with water)
- 1200 grit sand paper.(Used with water for final finishing)
- Rust converter.
- Paint brush to apply rust converter.
- Solvent such as acetone or lacquer thinners, that will not leave an oily residue.
- Tack cloth to remove dust prior to painting.
- Masking tape and news print to mask off areas that are not being painted.
- Compressor and spray gun.
- Suitable paint to apply over repaired area.
Step 1.
If the rust is flaky, remove the loose material with a putty knife or other suitable implement. Use some 400 grit sand paper on the sanding block to remove as much rust as possible, and make sure you clean a large enough area so that some healthy, bare metal is exposed around the rust spot. However, avoid passing the 400 grit paper over too much of the adjacent area, since the more scratches you make in healthy paint, the bigger the area you have to “feather” to avoid the sharp, drop-off edge of the existing paint, or to remove scratches from.
Step 2.
If the 400 grit paper does not remove all of the rust in pitted areas, use a smaller piece of paper wrapped around a finger tip, and concentrate only on those areas that the sanding block cannot clean up. AVOID the use of a sanding disc on a power drill or angle grinder- this method removes a lot of material very quickly, and if you are not practiced at removing rust, you can very easily sand right through the base metal. Besides, sanding discs leave deep scratches in the metal that are almost impossible to remove, or hide under paint.
Step 3.
If you are satisfied that all the rust has been removed, you need apply some rust converter before you start to fill in any imperfections. Rust converters “bind” any remaining rust molecules, which prevents the rust from re-developing and growing under the body filler and/or paint.
If there are deep pit marks, use body filler mixed to the instructions on the pack. If the imperfections are very shallow, such as scratches from sanding, use some spot putty, but be very careful to prepare spot putty exactly like the instructions on the pack to prevent the product from either not adhering to the metal, or to avoid it cracking as it cures.
NOTE: Do not try to apply the body filler or spot putty to the same level as the surrounding paint. This is impossible to do, so apply a slightly thicker coat that will have some structural strength once it has cured. Most body filler packs include a suitable applicator- use it because it is designed for the purpose of applying body filler.
Step 4.
With the body putty applied, allow it to cure for at least an hour. While you wait, repeat steps 1 to 3 on all the other rust spots you want to fix.
Step 5.
When the body filler is fully cured, you need to sand it down to the same level as the surrounding paint, but for this step you need to use progressively finer grit sand paper to avoid leaving scratches. Place a piece of 800 grit paper on the sanding block, dip the block in a container of clean water, and start sanding the area with a light, but steady pressure.
The water lubricates the paper, but it also prevents the formation of deep scratches. However, no matter how careful you are not to leave scratches, it will happen, so use the 800 grit paper only to smooth the body filler down.
Use the 1 200 grit, or even 1 500 grit paper to do the final finishing, using a lot of water to lubricate the process. The point of all of this is to bring the treated area to exactly the same level as the surrounding area, and this process, called “feathering” can be very time consuming. Nonetheless, it has to be done well to ensure a good end result, and a good way to achieve this is to close your eyes, and run your finger tips over the whole area under repair.
Your finger tips contain more nerve endings than any other body part, and you will immediately feel any imperfections, and especially where the body filler meets the surrounding paint.
Step 6.
Continue the feathering process until there are no more imperfections to feel with your eyes closed. The sanded-down area should follow the curves of the body work exactly, and there should be no detectable “border”, or boundary between the repaired area and the surrounding paint work.
Once you have achieved this, rinse all the dust and filler residue off the area, but be sure to dry the area off only with lint-free fabrics, and use some masking tape and news print to mask off any areas that are not under repair, and avoid touching the area with your bare hands after you have cleaned if off. You may think your hands are clean and free of oiliness, but they are not- you will see the proof of this when the primer refuses to adhere to the spots where you touched the area.
At this point, you will have some bare metal that will start to rust within seconds if you leave it bare. So use the tack-cloth to “pick up” any remaining dust particles, and apply a coat of primer that is compatible with the paint you are going to apply later. The primer will seal the area, but it will also provide a “key” for the colour coat to stick to.
NOTE: Before you start applying the primer with the spray gun, pour some water on the floor to hold down any dust there might be on the floor. You might think your work area is dust-free, but as you move around, you disturb the dust on the floor, which you will immediately notice when it settles on the painted area.
Step 7.
Unfortunately, the primer will not have a smooth, glossy finish, and you need to repeat the feathering process until the finish blends in perfectly with the surrounding area. Use your finger tips to detect imperfections- if you don’t remove them, they will be exaggerated, and compounded by the paint, and the more layers of paint you apply, the more the imperfections will stand out.
Step 8.
Assuming that all imperfections have been removed, repeat steps 3 to 7 on all the other areas you want to repair, but make absolutely sure you do not leave any metal bare for more than a few seconds before applying a coat of primer.
Step 9.
At this point, you should have repaired all the rust on your truck, and if you are not going to apply the final coats of paint yourself, you are just about done. Now is not the time to learn how to spray paint, but if you are good at it, you can now proceed to apply the colour and clear coats.
Step 10.
If you are not good at spray painting, we recommend that you don’t lose any time in getting the repaired areas painted. Some primers are not water proof, and none are hard-wearing, and the last thing you want or need is for rust to start up again under the newly applied primer, which it can within days, or even hours, so get the job done as soon as you can.
Enjoy learning how to fix rust on a truck?
Feel free to share this article on social media. It helps us out big time.


No Comments