
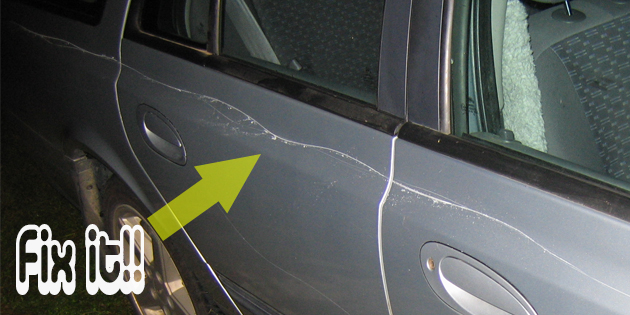
It sucks. You weren’t doing anything wrong.
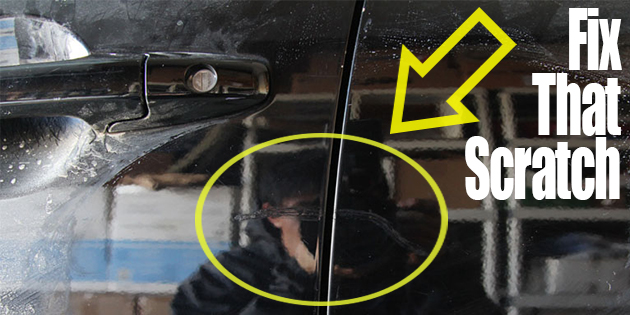
You leave your car in the parking only to come back to see it with a huge obnoxious scratch in it.
In this article, I will be teaching you how to fix a keyed car.
Assuming that the person who keyed your car was a complete stranger and there is no security footage, there’s not much you can really do.
You have two choices:
- Send your car to the mechanic
- Fix the issue your self.
The first option will cost a lot of money while the second options only requires a few hours of your time. Both options are an inconvenience but unless you can identify who keyed your car, it’s the only choices you’ve got.
Method 1: The Easiest Way
The youtube video above explains the easiest way to fix a key scratch in a car. It will require very minimal materials and will cost a fraction-of-a-fraction of what it would cost to get the repair done at a professional auto shop.
This method is recommended if you’re looking for a quick fix for a reasonable price. If you have a very expensive car or a car with a complex shiny paint job, it might be worth doing this a little differently. For most cars, this method is a life saver.
The materials are inexpensive to buy. The main solution that covers the cracks is the DYC repair kit. You can alternatively use lacquer thinner instead if you’d like.
What you’ll need:
- Touch up paint
- DYC repair kit (can also use Lacquer Thinner instead)
- Automotive vehicle wash (Simple Green works)
- Towel
Step 1: Cleaning the surface
The first step you’ll want to do is to clean your surface. To do this, you can use the automotive wash and a towel.
Take your time doing this. It’s important to get a clean surface because you don’t want the paint and scratch-filler to mix with dirt/dust.
Step 2: Applying the solution
For this step, you’ll either want to crack open the DYC repair solution, or, if you’re substituting that, your lacquer thinner. Still using the towel, smooth out the surface by applying the filler.
Be generous with the amount of filler you use. When it drys you should be able to brush your hand across the scratch and not be able to fall into the crack.
Warning: Before moving on to painting, make sure that the solution is dry.
Step 3: Masking
Even if you’re confident in your spray painting skills, you should always mask a car before painting it. It’s very easy for the paint to get caught in the wind and overspray on parts of your vehicle that shouldn’t be painted.
With that said, the masking also doesn’t have to be that perfect either. As said in the video, you should mask your scratch loosely so you can blend in the scratch with the rest of your car’s paint job.
Step 4: Painting
Now time for the moment of truth.
Painting.
For small touch-ups like this it is pretty straightforward as long as you got the correct paint can and have taken time to make sure your preparation is perfect.
Note: This might be obvious, but make sure the paint you have matches your cars paint code exactly. If your car is white, don’t look for any old white paint. A slight variation in color will stand out like a sore thumb on your car.
Start with a nice even first coat. Be careful not to be too heavy at first and watch out for runs. You may want to do a few coats. Allow the paint to dry adequately between coats.
Method 2: The Slightly Harder Method
If you have access to a lot of auto-repair tools, or simply don’t mind buying them, this method will help you professionally remove that annoying key scratch.
This method is recommended if you don’t mind sinking a good amount of time and patience into this project. This method is especially useful for large scratches. The car in this video has a scratch that spans most of the car’s length.
This is my favorite method because it makes your car look brand new again. We’ll even be using clear coat to give that shiny look back to our car.
The person filming the video above even took off the door handles and one of the mirrors to spray them separately. That is optional but also an important idea to think about.
What you’ll need:
- Sand paper (320 and 600 grit)
- Palm sander (optional but helpful)
- Color-matched paint
- Primer
- Clear coat
Step 1: Sanding
First, you’ll want to sand the surface with some 320 grit sandpaper. Your objective is to get rid of the scratch and make your car’s surface flush again.
Step 2: Masking
Next, you’ll want to mask off the area where you’ll be painting/priming. Make sure to cover up windows that you’ll be painting near. Overspray can end out badly so it is better safe than sorry.
Step 3: Priming
You’ll want to put on 2-4 codes of primer. It’s important to take your time and make sure to apply even coats. This will help your paint actually stick to the car.
Step 4: Prepping the primer
Next, you’ll want to sand the primer with 600 grit sandpaper. Once again, make sure to make sure that everything is flush and smooth.
Step 5: Spraying your base coat
In the video, they applied 3 coats of base coat. Make sure you put on an even distribution of paint and also make sure to avoid runs. If you see paint bubbles, that’s a sign that you weren’t careful enough in the prep work.
Step 6: Spraying clear coat
After you’re confident in your base coats, it’s time for the clear coat. Spray it on normally just like everything else. Be sure that your base coat is dry before clear coating.
Final Notes: How To Fix a Keyed Car
I hope you have found value in this article. I wanted to include multiple methods for you to repair a keyed car that suits both the beginner and expert mechanic.
Please do us a big favor by sharing this article on social media. It takes two seconds and helps us out tremendously. Thank you!
No Comments