

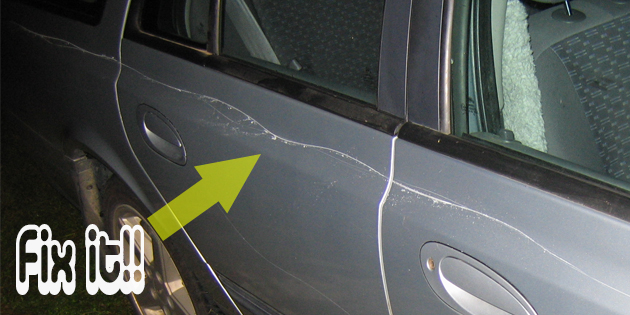
While we all do our best to protect our vehicles against damage of all kinds, it is almost inevitable that at some point, the paint work will get chipped by stones and other debris thrown up by passing traffic.
If the worst happens and you do get chips in the paint work on your car, you could of course let a body shop fix the damage, but you could also do it yourself.
While we are not suggesting that everybody could repair this type of damage, it is certainly doable, and it will cost a whole lot less than it would have at a body shop. All you need is some basic equipment that you can make yourself, some touch-up paint, some patience, and of course, this handy, step-by-step guide. Here is how to do it…
Time required:
Up to seven days, because the repaired area needs to fully cure before the job could be considered complete.
Difficulty level:
It is tempting to say that fixing paint chips is easy. It could be easy of course, but depending on the size of the chip, the equipment you use, and your skill level, you might find it very difficult to achieve a satisfactory result.
Special precautions:
- Do not work in direct sunlight because the high temperature of the body work will influence the way the paint cures.
- Do not smoke while working with flammable solvents- you could accidentally set the car (or yourself) on fire if solvent vapors ignite when you light up.
You will need:
Since there are now ready-made kits to repair paint chips, you need to make some items yourself. Here is a list of items you need, but depending on the size of the repair, you may need additional items.
- Touch-up paint. The closest matching paint is available from the dealer, who will supply a small quantity of paint of the exact color of your car. Find the paint code on the label that also contains the VIN number.
- Clear lacquer that is compatible with the paint.
- Primer that is compatible with the paint.
- Solvent that is compatible with the paint. Denatured alcohol, also known as rubbing alcohol, makes an excellent degreaser but it might not work as a thinning agent for paint.
- Lacquer thinners to thin the paint if the paint is too thick.
- Several sheets of 1 600 grit of Wet-or-Dry sandpaper.
- Small sanding block, or a piece of wood with a perfectly smooth sides. You need this to sand down the filled-in area.
- Several pencils with erasers on the end. You will need to stick little discs of sandpaper on the erasers to be able to feather small chips.
- Glue to stick sandpaper discs to the erasers.
- Lint-free rags.
- Polystyrene cups and masking tape. You need the cups to protect the newly painted area, and the masking tape to hold the cups down.
- Bamboo, or wooden BBQ skewers. You need these as “brushes” to fill in small chips.
- Small, sharp-pointed craft brushes to fill in larger chips.
- Scalpel, or a similar sharp instrument to remove loose and flaking paint from the edges of the chip.
Step 1.
Proper preparation is key to the success of this project, so start by making some small “sanding blocks” by cutting out discs of sandpaper, and sticking them to the pencil erasers. Next, while the glue is drying, use the scalpel to remove all loose, and/or flaking paint from around the edges of the chip.
Loose paint will eventually flake off and destroy your handiwork. Remove all paint until you reach solid, healthy paint.
Step 2.
Use the degreaser to remove all traces of wax, polish, or grime from the chip.
Step 3.
Use one of your home made pencil sanding blocks to carefully sand down the area inside the chip. However, be careful not to sand down too much of the surrounding area- the bigger the sanded area, the more difficult it becomes to blend in the touch-up paint. While you are sanding the area, use plenty of water as a lubricant, and keep at it until the rough edges of the chip is sloped down towards the bottom of the chip.
NOTE: The object is to make the boundary between the existing paint and the chip as indistinct as possible, without enlarging the area to be repaired much bigger than it already is.
Step 4.
If the underlying primer is intact, half the battle is won, but if bare metal shows through, you need to prime the area, or the paint won’t stick. However, before you apply anything to the chip, you need to make sure it is free of dust, so wipe the area clean with some of the lacquer thinners to remove the dust.
Step 5.
Next, dip the first few millimetres of a BBQ skewer into the paint, but make sure there is no “blob” of paint hanging from the tip. If there is, shake it off, and place the tip of the skewer in the centre of the chip. Capillary action will transfer the paint from the skewer, and if you got the amount of primer right, it will flow over the entire area of the chip.
NOTE: Resist the temptation to keep on applying primer if the chip is not filled on the first pass. You might end up overfilling the chip, which will not leave enough room for the color and clear coats. If you don’t cover the entire chip on the first try, stick a polystyrene cup over the chip with some masking tape, and allow it to dry for at least two hours, before repeating the process until the entire chip surface is primed.
Step 6.
Assuming that the chip is now primed properly (and fully cured), you need to sand the primer down with another pencil sander until the surface is perfectly smooth, and there is no detectable edge between the chip and the surrounding paint. Be careful however, that you don’t sand off the primer, which is softer than the surrounding paint. Clean the area again to remove all dust.
Step 7.
Now comes the really tricky part. You now need to fill in the chip with paint, but we recommend that you first practice a bit on a piece of cardboard . Dip a skewer in the paint, and see how much paint it takes to fill an area the same size as the chip.
If you overfill the chip you will get runs, which are really difficult to remove, so if you are confident that you can fill the chip in one try, go ahead and fill it. If you got this step right, you will have an even coating of paint over the whole area of the chip, but you will still be below the level of the surrounding paint.
As with the primer, resist the temptation to apply too much paint. The better option is to cover the chip, allow the paint to dry, and to repeat the process until you have an even coating of paint inside the chip.
NOTE: On chips that are bigger than the diameter of a pencil, you may want to use the small craft brush to flow the paint into the chip. Resist the temptation to paint the chip like you would a fence or a chair. Just dip the tip of the brush into the paint, and allow capillary action to transfer the paint to the chip surface.
Step 8.
At this point, you should have the chip filled in nearly to the level of the surrounding paint, and if you have, you are nearly there. You now need to apply the clear coat to protect the underlying color coat, so repeat the process of filling in the chip with either a skewer, or the brush, but be careful of applying too much paint in one pass.
The object is to fill the chip to slightly above the level of the surrounding paint, so that you can sand some off to achieve the same finish as the surrounding paint. There is no way to fill a chip to the same level as the surrounding paint without the repair showing, so you need to apply several coats of clear lacquer to get to the correct level, but be sure to allow the recommended drying time for each successive coat.
Step 9.
Assuming that you got all the preceding steps exactly right, the chip should now be filled in, with its surface very slightly above that of the surrounding paint. This level must be reduced to that of the surrounding paint to achieve a professional result, so if you have the inclination, use another pencil sanding block to VERY GENTLY sand the repaired area down.
However, avoid using a circular sanding pattern, and be careful not to sand down too much of the surrounding area. Use a backward and forward motion, and use plenty of water as lubrication.
NOTE: Even if you allowed several hours drying time between each successive coat of clear lacquer, the top layer will still be very soft, and you could very easily remove all of the clear coat. Therefore, use the lightest pressure that will have an effect, and check the surface every few minutes to confirm that is has not fallen below the level of the surrounding paint.
Step 10.
Step 9 can take an hour or more, but if you are satisfied that there is no detectable boundary between the repaired area and the surrounding paint, you should have a repair that will be difficult to detect unless you actively look for it.
Nevertheless, the repaired area will most likely not match the surrounding area in smoothness, but resist the temptation to use wax or rubbing compound the buff out any scratches. The paint will be too soft to withstand the abrasiveness of rubbing compound especially , so allow at least seven to ten days before you wash the car, or do anything else to blend in the repaired area.
Once the paint is fully cured, you could use some talcum powder and a soft cloth to buff the area, of if there are still deep scratches present, you could use a good quality wax to buff them out.
Enjoy learning how to fix paint chips on your car?
Please do us a big favor by sharing this article on social media. It helps us a lot!

No Comments