
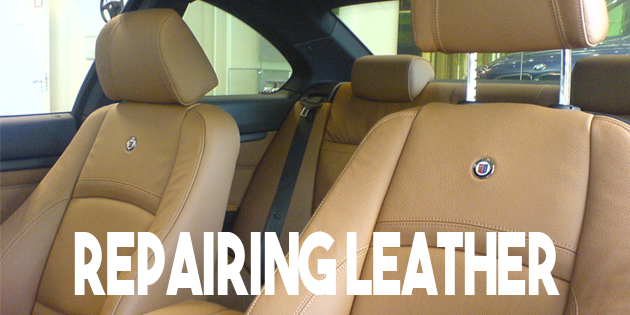
While full leather seats are attractive features on any car, the fact is that the paper-thin leather on some seats can wear out very quickly.
So what do you do when it happens with your car? Do you have the seats replaced at astronomical cost, or do you simply repair them to look (almost) new again- without having them re-upholstered? Can leather seats even be repaired?
Absolutely. Repairing scuffed, faded, or even cracked leather seats is a relatively simple affair, and almost anyone can do it. Moreover, it costs a small fraction of having it done professionally, so if you want to breathe new life into your somewhat faded car interior, here is how to do it.
Time required:
From a few hours to several days, depending on the severity, and amount of repair work to be done.
Difficulty level:
Easy to moderately difficult, depending the severity of the damage to be repaired, and whether the seats have to removed from the car or not.
Special precautions:
- Do NOT use hydrocarbon–based solvents to clean leather car seats because these solvent will stain leather (or even remove factory-applied colorants on leather seats.)
- Ensure that every application of every product in the leather repair kit is fully dry or cured before applying the next layer or coat.
- Always test all the products in a leather repair kit on an inconspicuous part of the seat to check for color matching, colorfastness, and compatibility with the leather. Leather repair kits are not created equal, and some kits may not perform as expected. Learn more about leather repair kits here.
You will need:
- Leather repair kit
- Tools to remove seats that cannot be repaired in-situ.
- Handheld vacuum cleaner
- Microfiber towels
- Disposable rubber gloves
- Isopropyl alcohol
- 400- to 800-Grit sandpaper
- Water
- Sponges
- Hair Dryer (Optional)
- Leather Conditioner
Step 1.
Use the vacuum cleaner to remove all dust and loose debris from the seat to be repaired if the damaged area is easily accessible.
It is however best to remove seats that are damaged over large areas, or are damaged in areas that are not easily accessible.
Step 2.
Once all loose debris are removed from the seat, clean the entire seat with a microfiber towel and the isopropyl alcohol. This step could take several applications of solvent to remove all accumulated grime.
Continue the cleaning process until a new microfiber towel shows no discoloration. However, avoid soaking the leather with alcohol, because it will take days to dry, and it may damage the underlying foam. Allow the seat to dry completely.
TIP: Clean the entire seat to ensure that the repaired area blends in better. Cleaning just the area under repair will make the repair stand out.
Step 3.
When the seat is fully dry, inspect the entire seat for signs of fading, tears, and perforations.
If there are separated seams, use the adhesive that came with the repair kit to glue the seam back together.
Follow the included instructions closely, and do of allow the adhesive to come in to contact with any part of the seat that is not being repaired. Wear disposable rubber gloves to avoid skin contact with the adhesive.
WARNING: this adhesive is essentially superglue, but it is specially formulated for use on leather. Never use ordinary superglue to repair leather, because the repair will not last, and it may even damage the leather even more.
Step 4.
If the leather is cracked, faded, or scuffed, use some 800 grit sandpaper the LIGHTLY sand the entire area until it is smooth, and all roughness has been removed.
This step is especially important, since the new colorant will not adhere to the leather if even traces of the original dye is present.
Step 5.
Leather repair kits include a filler with which to fill the crack and holes, but do NOT apply any of it to a visible part of the seat until you have mixed up a small batch that matches the color of your seats exactly.
Do this by following the mixing instructions that came with the kit, but do NOT use any product that is not included in the kit.
Apply a SMALL amount of the prepared filler to an inconspicuous part of the seat, and continue to adjust the color until you have an EXACT match.
If you get the color wrong, the difference will stand out like a sore thumb, so spend as much time as it takes to get the color of the filler right.
TIP: It is almost impossible to repair large tears and holes in leather with leather repair kits. The repair will always be visible, and while it is possible to apply patches both on top and under large holes, these methods hardly ever look professional or offer a reliable, long-term solution. The better option is to have the entire seat re-upholstered, or replaced with a seat in good condition from a wrecked car. Minor imperfections on the replacement seat can always be fixed with a leather repair kit, but large holes in the existing seat cannot.
Step 6.
Once your satisfied that the colors will match, apply the filer to cracks and small holes with the spatula that came with the kit. However, avoid filling up the cracks or holes in one go, because the filler may shrink upon drying. Only apply a thin coat or layer, and allow to dry before applying the next.
TIP: If the leather is not actually cracked or perforated, but only scuffed or faded, mix some filler, match the color to your seat, and then dilute the filler with two parts water to one part filler. Apply this mixture with a sponge, but make sure you get the filler into all the imperfections. Allow to dry for one minute, and then wipe off all the filler with a clean, but dampened microfiber towel.
The filler will not adhere to good leather, so you will see an improvement immediately. If the repaired area does not match the surrounding area, repeat this step until the repaired area blends in with the surrounding leather.
Step 7.
At this point, the repaired area should be almost indistinguishable from the rest of the seat, but you need to protect the repaired area with a good quality leather conditioner. However, do NOT apply the conditioner directly after you have repaired the leather. The colorant needs time to “set”, so let the seat dry completely, preferably overnight.
It is possible to hasten the drying process with a hair dryer, but the best results are obtained when the colorant is allowed to dry by itself. Allow at least twelve hours before applying a coat of leather conditioner. Allow the recommended drying time for this coat (read the label), and apply a second coat.
One more thing…
Your seats should now look a whole lot better, but bear in mind that no leather repair kit can turn old, worn leather into new leather. At best, you can expect to make defects, stains, perforations and holes less obvious, but with some practice, it is possible to make worn leather seats look (almost) new.
Also bear in mind that exposure to direct sunlight will affect the repaired area faster than the rest of the seat, which will make the repaired area stand out.
Therefore, try to avoid parking in direct sunlight, but if you have to park in direct sunlight, invest in solar shields to fit over the front and rear windshields on the inside of the car.
Doing this will reduce the amount of UV radiation that enters the car, which will greatly extend the life of your repaired seats.
Enjoy learning how to repair leather car seats?
If so, please share this article on social media. It only takes a few seconds to do and helps us tremendously. Thank you!


No Comments